Adding Your First Product
Learn how to add a simple product to your Point catalog from start to finish.
What You'll Learn
- How to navigate to the Products section and open the Add Product form
- How to fill in product name, barcode, tax type, and cost
- How to set the selling price and quantity for each branch
- How to upload a product image and assign a category and tags
- How to save the product and confirm it appears in your catalog
Before You Begin
- You must be logged in as an Owner or a user with product-management permissions
- At least one branch must be configured in your account
- A product category is optional but recommended — you can create one inline
Only owners and managers can add or edit products. Cashiers can view and sell products but cannot create or modify them.
Step 1: Go to Products
From the main navigation, click Products. You will see the full product list (or the empty state if no products have been added yet).
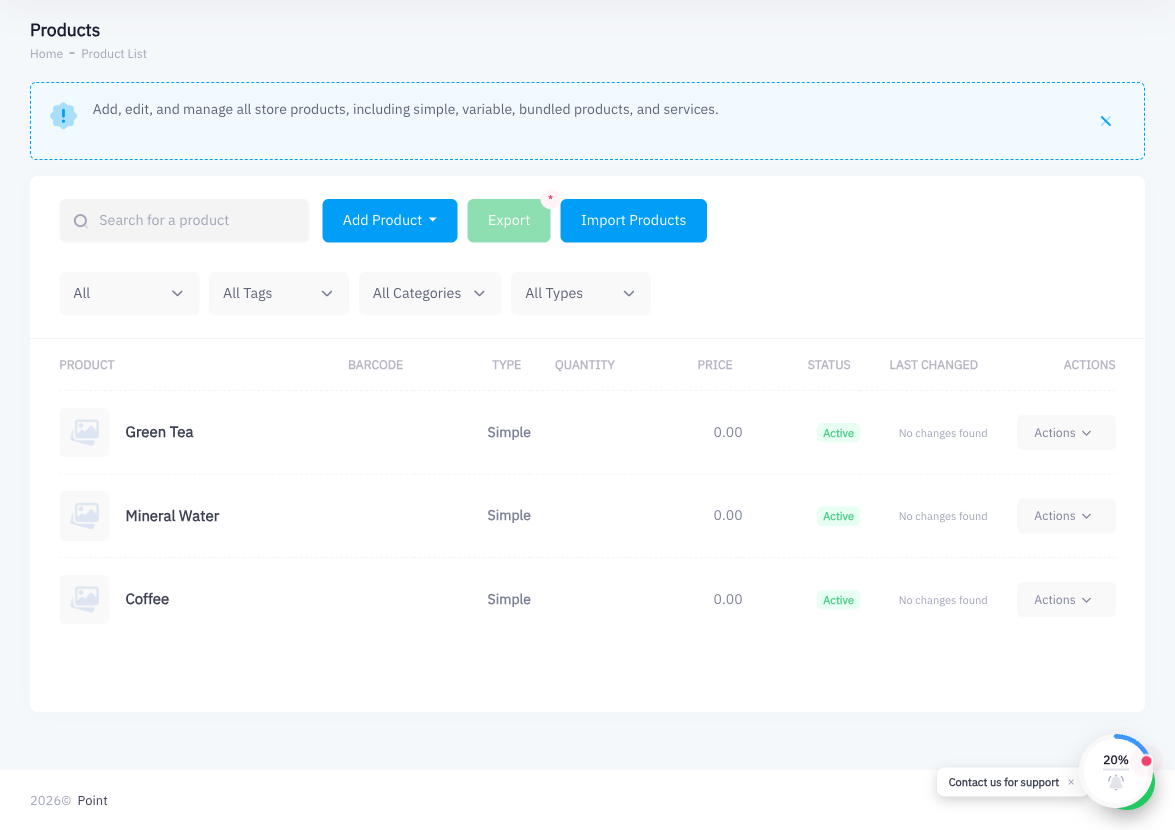
Step 2: Click Add Product > Simple
Click the Add Product button in the top-right corner. A dropdown appears with five product types: Simple, Weighted, Service, Composite, and Variant. Choose Simple for a standard retail product with a fixed price.
Step 3: Enter the Product Name
In the Product Name field, type your product's name. If you want to generate an English transliteration from an Arabic name, click the Transliterate button next to the field. This is useful for barcode scanners that require Latin characters.
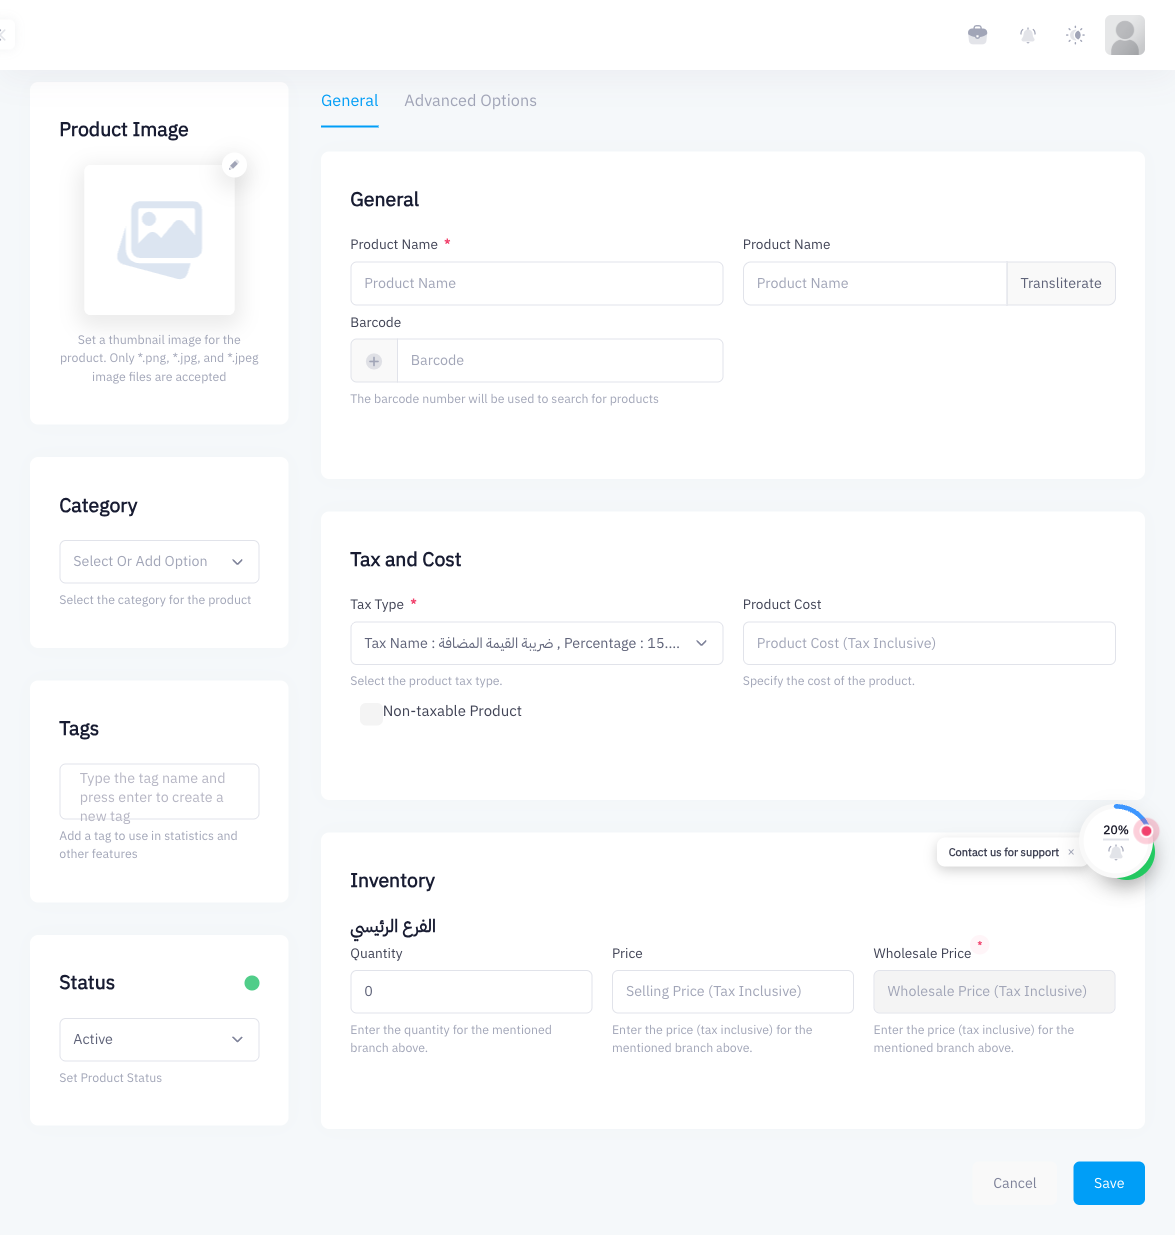
Step 4: Enter a Barcode (Optional)
In the Barcode field, type or scan the product's barcode number. The barcode is used to search for and add the product quickly during checkout. If you do not have a barcode, leave this field blank — Point will still identify the product by name.
Step 5: Set the Tax Type
Click the Tax Type dropdown and select the applicable tax rate. For most retail products in Saudi Arabia, select ضريبة القيمة المضافة 15% (VAT 15%). For products that are exempt from tax, select Non-taxable.
Step 6: Set the Product Cost
In the Product Cost field, enter what you paid to acquire the product (your purchase cost). This value is used for profit margin calculations and reports. It does not appear on customer receipts.
Step 7: Set Branch Quantity and Selling Price
Scroll down to the Inventory section. For each branch listed:
- Enter the current stock Quantity.
- Enter the Price — this is the tax-inclusive selling price that customers pay.
The price entered here is tax-inclusive. VAT is already calculated within the displayed price. Point will extract and report VAT separately on ZATCA-compliant invoices.
If your plan includes wholesale pricing, you will also see a Wholesale Price field next to each branch row.
Step 8: Upload a Product Image (Optional)
In the left sidebar, click the product image placeholder and upload a PNG, JPG, or JPEG file. A clear image helps cashiers identify products quickly on the POS screen.
Step 9: Assign a Category (Optional)
Still in the left sidebar, click the Category dropdown. You can select an existing category or type a new name and create one inline. Categories appear as filter buttons on the cashier POS screen, making it faster to find products during a sale.
Step 10: Click Save
Click the Save button to create the product. Point returns you to the product list where the new product appears immediately.
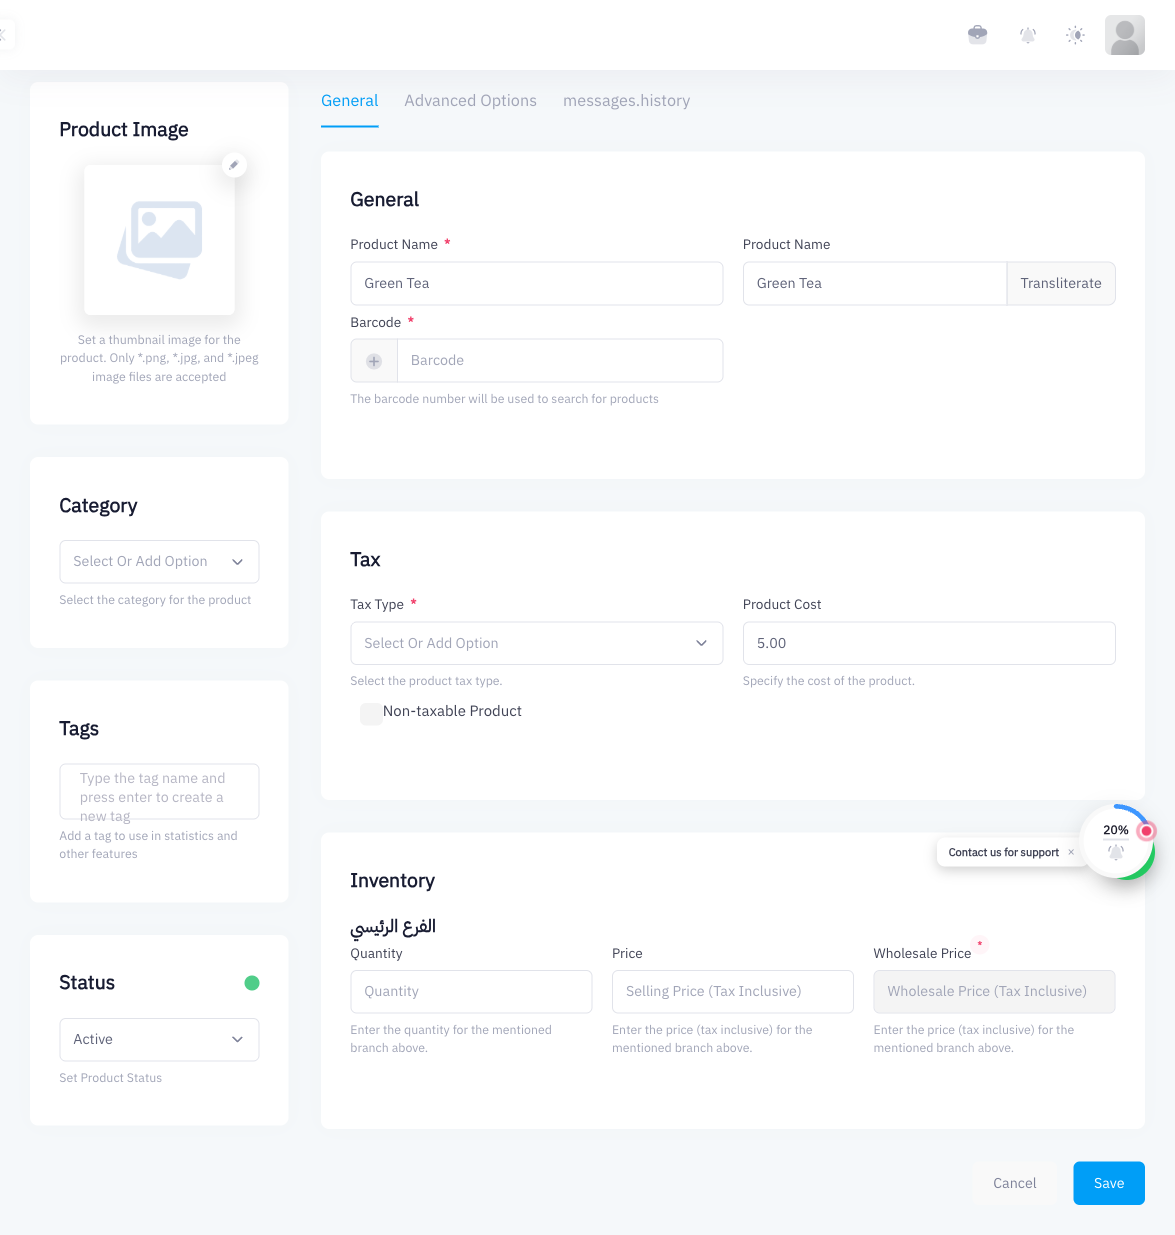
Summary
You have added your first simple product to Point. You entered the product name, optional barcode, tax type, purchase cost, branch stock levels, and tax-inclusive selling price. The product is now available in your catalog and searchable on the POS cashier screen.
What's Next
- Product Variants — add size or color options to a product
- Categories & Tags — organize your catalog for faster selling
- Bulk Import from Excel — add many products at once