Inviting Employees
Once your branch and register are ready, the next step is to create accounts for anyone who'll be working in the system — cashiers, managers, or supervisors.
What You'll Learn
- How to add an employee account
- How to assign a permission group (role)
- How to restrict an employee to specific branches
- How employees log in
Before You Begin
- You're logged in as the account owner
- You've set up at least one branch (employees need a branch to be assigned to)
- You're on the Starter plan or higher if you need more than one employee (the Free plan includes only the owner account)
You control what each employee can see and do through permission groups. The default group shown is Manager (مدير), which gives full access. You can create more granular groups in the Permissions settings if needed.
You'll receive your login credentials (email and password) from the store owner. Log in at the same login page using your email and password — you don't need to register.
Step 1: Go to Employees
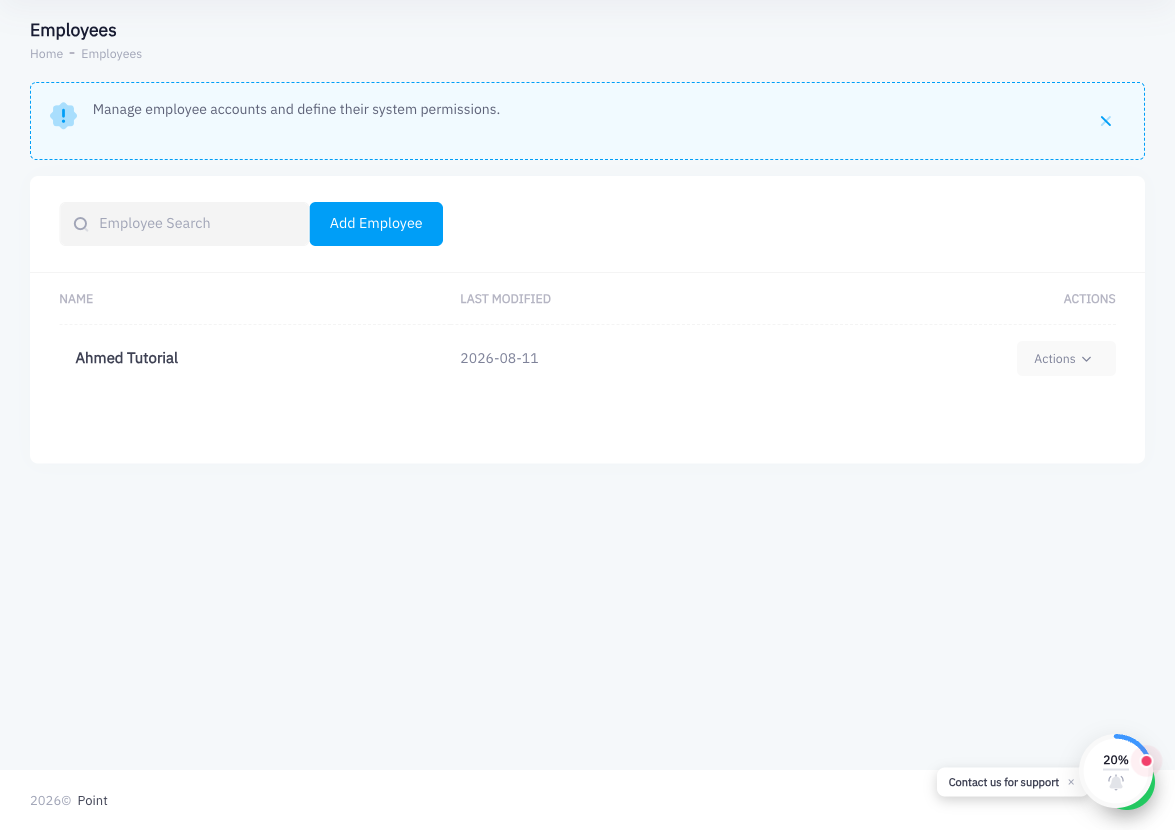
From the main sidebar, click Employees. The URL will be /employees. You'll see a list of all existing employee accounts with their name, last-modified date, and action buttons.
Step 2: Click Add Employee
Click the Add Employee button in the top-right area. The URL will change to /employees/add and you'll see the employee creation form.
Step 3: Fill In the Login Credentials
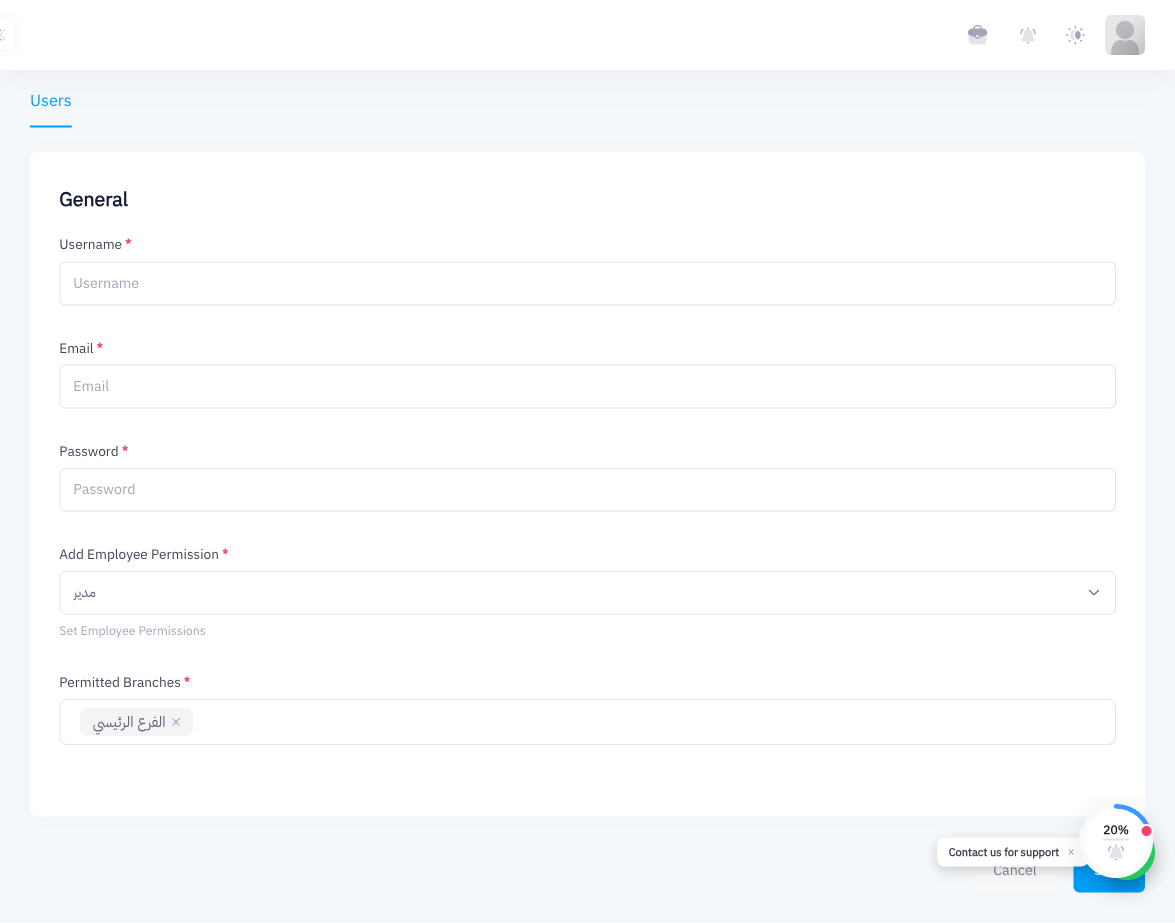
Under the Users section of the form, fill in:
- Username — A display name for the employee (used inside the system, not for login).
- Email — The email address the employee will use to log in. Must be unique across the system.
- Password — Set a temporary password. Remind the employee to treat this as confidential.
Step 4: Select a Permission Group
Under Permission Group, pick the role that matches this employee's responsibilities:
- Manager (مدير) — Full back-office access: products, reports, settings, and the POS.
- Other groups you've created — If you've set up more restrictive groups (e.g., Cashier-only), select the appropriate one here.
The permission group controls which menu items and actions the employee can access.
Step 5: Assign Permitted Branches
Under Permitted Branches, check every branch this employee is allowed to work at. An employee can only open a POS session on a register that belongs to one of their permitted branches.
If your business has multiple branches and you want to restrict a cashier to a single location, only check that branch. Managers who need access to all branches should have all branches checked.
Step 6: Click Save
Click the Save (or Add Employee) button to create the account. The employee will appear in the employees list.
Step 7: Share the Login Credentials
Point does not send an automated welcome email. You'll need to personally share the employee's login credentials with them:
- Login URL — The same
/loginpage you use. - Email — The email you entered in Step 3.
- Password — The password you set in Step 3.
Remind them to keep their password secure.
Summary
Adding an employee takes under a minute: go to Employees, click Add Employee, fill in their name, email, and password, pick a permission group, check their permitted branches, and save. Then hand them their credentials. They'll log in at the same page as you using their email and password, and they'll only see the parts of the system their permission group allows.
What's Next
- What is Point? — Review the platform overview if you skipped it
- Setting Up Your Branch
- Setting Up Your Register